I am embarking on a quest of sorts to “recycle” an old sewing machine table I’ve carted around from move to move and held in storage for something like 15 years. My goal is to turn it into a hub in my computer room to store a UPS, a laser printer, a Synology, several hubs, a modem, a router, a 5-port switch … While tastefully arranging lots and lots of cables and power cords and allowing for good air flow. This will sit next to my computer desk at the point where I’m having fiber installed in a couple of weeks, so I’ll be able to hardwire my computer and keep all the associated network and associated gear neatly in place next to it.
Not sure how this is going to turn out, I’m designing it on the fly and relying on a sketch. Today, I got things started.
I began by disassembling the sewing machine table, which was quite an effort. I’m keeping the parts I don’t use in the hopes that I can use them elsewhere. There is some very interesting hardware here that I’m certain I find a use for in future projects. I’m thinking of mounting the foot pedal as part of the back cabinet “wall” for air flow, maybe to route some cables, and because I think it will look cool.

The first step is to create a lower bar to hold the eventual shelf that is going to be housed inside the iron frame. This is a scrap of bubinga. I will hold this in place with two dowels inserted into the lower screw holes of the iron frame.

The next step is to make the dowels. I’m using walnut here, pounded through a 1/2 inch dowel jig. Turns out 1/2 was a bit too large so I had to shave them down to a proper millimeter size to fit the screw holes.

Next, I drilled holes in each end of the bubinga bar to house the dowels.

Here’s what it looks like rough assembled.

Here’s a front view. The cabinet I’m going to build will be mounted on this bubinga bar at the bottom. At the top, the cabinet will be held in the frame by two wedged tenons.

Next up I needed to join two 8 foot lengths of sapele so I have boards wide enough for the project. This is an image of joining the edges.

And I glued them up so I’m ready to start cutting out the cabinet pieces tomorrow.

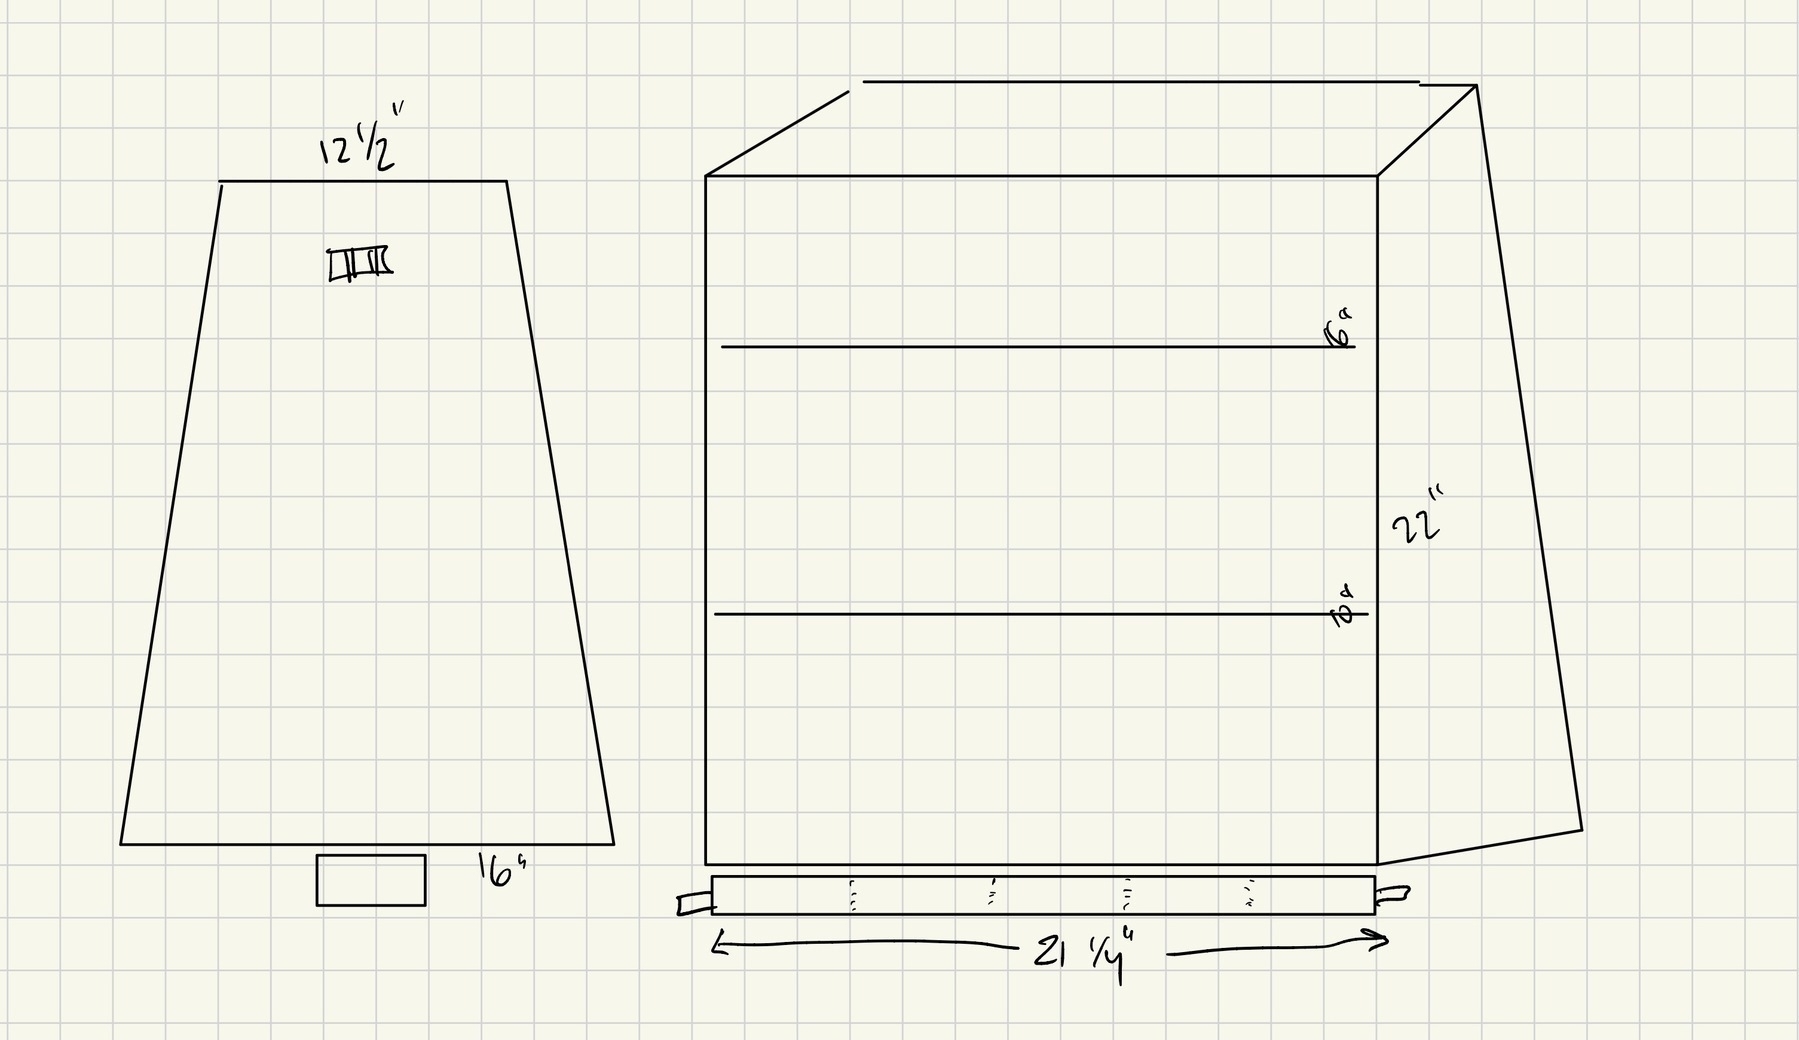
I sketched out a rough plan. I think this is the right kind of project to sketch out the basic idea but figure out the finer details as I go along. This sketch shows a side and front view. The cabinet will taper to fit the shape of the table. One thing I haven’t figured out: I want the UPS to sit on a shelf that faces the back wall. No idea how I’m going to do that at this point.